guides
How to Smoke Ribs Using the 3-2-1 Method
The 3-2-1 rib method decoded: 3 hours smoke, 2 hours wrapped, 1 hour to finish. Step-by-step guide with timing, temps, and pro tips for spare ribs.
 Cole Whitaker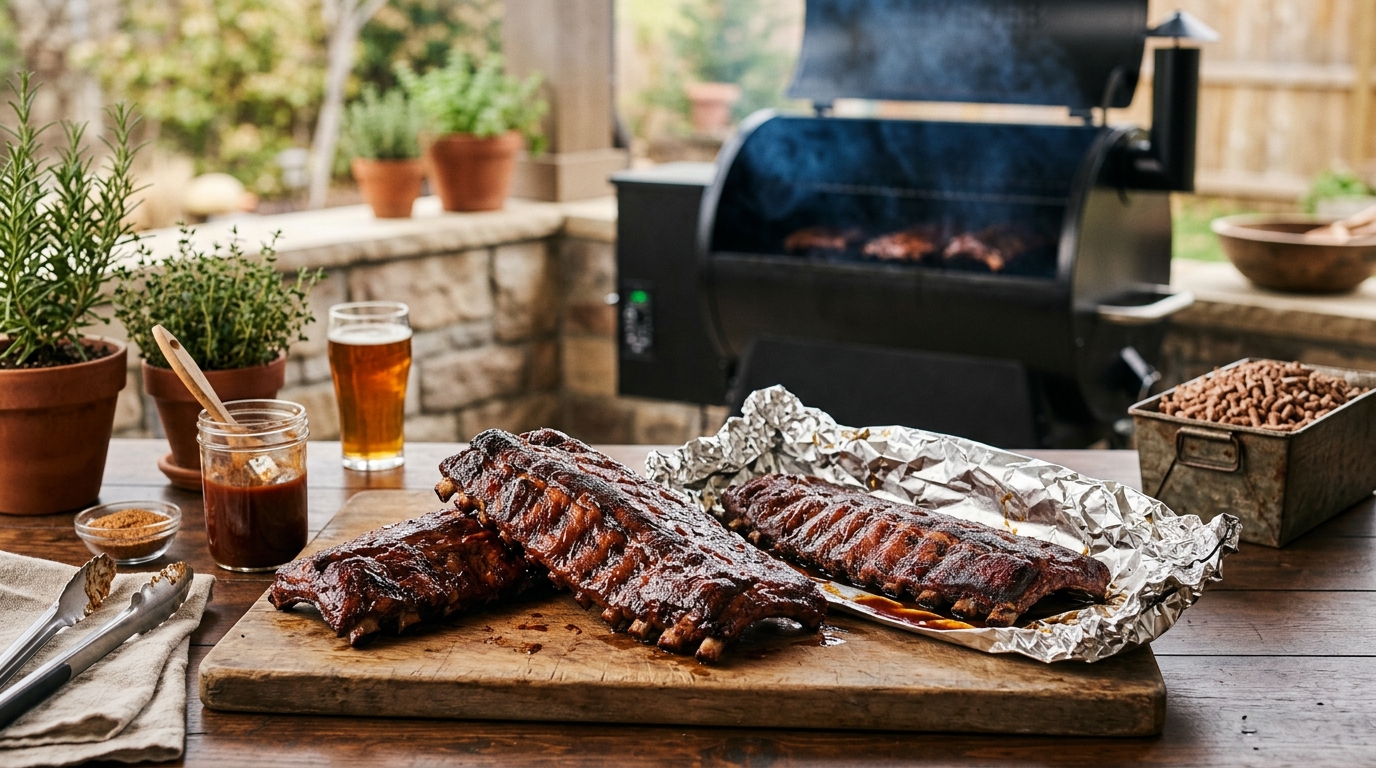
The 3-2-1 rib method: smoke spare ribs unwrapped at 225°F for 3 hours to build bark and a smoke ring, wrap tightly in foil with butter and apple juice for 2 hours to braise them fall-off-the-bone tender, then return to the grate unwrapped for 1 final hour to firm the crust and set any sauce. Total cook time: 6 hours, nearly all hands-off.
What exactly is the 3-2-1 method?
The 3-2-1 method is a structured three-phase smoking schedule for pork ribs. Each number represents hours in a distinct cooking environment:
- 3 hours — Ribs sit naked on the grate at 225°F, exposed to smoke. This phase builds the bark, sets the smoke ring, and begins rendering the surface fat.
- 2 hours — Ribs wrap tightly in heavy-duty foil with added liquid. The sealed packet creates a braising environment that breaks down collagen and drives the meat to fall-off-the-bone tenderness.
- 1 hour — Ribs return to the grate unwrapped to re-firm the bark and caramelize sauce applied in the final 20 minutes.
The method was developed specifically for spare ribs — a larger, fattier cut that needs the full 6 hours to render properly. It narrows the margin for error compared to smoking ribs completely unwrapped and produces consistent results even on an entry-level smoker.
Which rib cut works best for 3-2-1?
| Product | Best for | Rating | Notes | |
|---|---|---|---|---|
| Spare ribs | Full 3-2-1 method, maximum flavor and value | ★★★★★ | The original cut for the 3-2-1 method. High fat content and connective tissue that fully renders in 6 hours. Best overall rib flavor and most forgiving of slight timing variation. | — |
| St. Louis cut ribs | Competition-style presentation, uniform shape | ★★★★☆ | Spare ribs trimmed of the sternum and cartilage for a neat rectangular rack. Same 3-2-1 timing as full spare ribs. The preferred cut in competition BBQ for even cooking and clean presentation. | — |
| Baby back ribs | Shorter cooks, leaner texture, beginners | ★★★★☆ | Use 2-2-1 instead of 3-2-1. Baby backs are smaller and leaner — a full 3-hour naked phase overcooks the exterior. Reduce each phase by 1 hour for best results. | — |
Stick with spare ribs or St. Louis cut for a true 3-2-1 cook. Baby back ribs require the modified 2-2-1 schedule — detailed in our how to smoke pork ribs guide.
What you need before you start
Non-negotiable equipment:
- A smoker — any type works. Offset, pellet, kettle, and kamado grills all produce excellent 3-2-1 ribs.
- A dual-probe thermometer — one probe monitors grate-level temperature; the second monitors the meat during Phase 3.
- Heavy-duty aluminum foil — standard foil often tears during the wrap phase. Double-layer regular foil if heavy-duty is unavailable.
- Heat-resistant gloves — for handling hot racks and the boiling-hot foil packet.
- A spray bottle with apple juice or cider vinegar for spritzing during Phase 1.
A reliable wireless thermometer makes managing a 6-hour cook much easier:
Best for Monitoring grate temp and meat temp across a long smoke
ThermoPro TP25 4-Probe Wireless Thermometer
Four probes with Bluetooth range up to 500 feet and a smartphone app with preset temperature alerts. Set it and walk away from the smoker with confidence.
★★★★★ 4.6 · 12,400 reviews
Check current price on Amazon→Ingredients for the foil wrap (per rack):
- 2 tablespoons unsalted butter, sliced
- 2 tablespoons honey or brown sugar
- 2 tablespoons apple juice or apple cider vinegar
Step 1: Prep the ribs
Great 3-2-1 ribs start with 15 minutes of prep before the smoker is ever turned on.
Trim excess fat. Spare ribs often have a thick fat cap on the meat side and a large chunk of hard fat at the thick end. Trim any fat thicker than 1/4 inch — thick fat does not fully render even in a 6-hour cook.
Remove the membrane. Flip the rack bone-side up. You will see a thin, opaque white membrane stretched tight across the bones. Slide a blunt butter knife under it near one end, grip firmly with a dry paper towel, and peel it off in one steady pull. This membrane remains tough regardless of cooking time and blocks the rub and smoke from reaching the bone side of the meat.
Apply the dry rub. Coat both sides lightly with yellow mustard or olive oil as a binder — it burns off cleanly without affecting flavor. Apply dry rub generously on all surfaces and press it in firmly. A basic rub for spare ribs: equal parts kosher salt, black pepper, paprika, garlic powder, and onion powder, plus half as much brown sugar and a small amount of cayenne.
A competition-proven rub to start with:
Best for Spare ribs, baby backs, pork shoulder
Killer Hogs The BBQ Rub
Balanced blend of salt, sugar, and spice from a championship BBQ team. Works on pork without any adjustment and holds up well through a 6-hour smoke.
★★★★★ 4.7 · 8,900 reviews
Check current price on Amazon→Let the rubbed racks sit at room temperature while your smoker climbs to 225°F — about 20 to 30 minutes.
Step 2: Get your smoker ready
These setup steps apply regardless of what type of smoker you own.
Target temperature: 225°F at grate level. The built-in lid thermometer on most smokers reads 25 to 50°F hotter than the actual grate temperature. Always use a probe at grate level to confirm.
Offset smokers: Load the firebox and preheat to 225°F before adding the meat. Add splits every 45 to 60 minutes. Keep the exhaust vent fully open and control temperature with the intake vent.
Pellet grills: Fill the hopper, set to 225°F, and let the auger prime for 10 to 15 minutes. No further adjustments are needed — the controller manages temperature automatically.
Kettle grills: Bank lit charcoal to one side with wood chunks on top. Place a drip pan filled with water on the opposite side under where the ribs will cook. Put the ribs over the drip pan, not the coals, and position the top vent directly above the meat to draw smoke across it.
Kamado grills: Use the plate setter (legs up) for indirect heat. Stabilize at 225°F for 15 minutes before adding meat — kamados hold temperature extremely well once dialed in.
Phase 1 — 3 hours of naked smoke
Place the racks bone-side down on the grate. Keeping ribs bone-side down positions the fat layer between the heat source and the meat, so the fat bastes the meat from below as it renders.
Add your wood at the start of Phase 1 only. The ribs absorb smoke most readily during this uncovered phase, before the bark seals and before the foil blocks smoke access in Phase 2.
Spritz starting at the 60-minute mark. Open the smoker as infrequently as possible — every opening drops temperature and adds time. After the first hour, spritz every 45 to 60 minutes with apple juice, cider vinegar, or a 50/50 blend. The spritz slows the exterior from drying out while the bark develops and adds a subtle tang that complements pork.
What to look for at 3 hours: The bark should be set and slightly firm to the touch. A smoke ring — a pink band just below the surface — will be visible on the meat side. The exterior will look dark and dry. This is correct and expected. Do not panic and wrap early.
Phase 2 — 2 hours wrapped in foil
The wrap phase is what makes 3-2-1 ribs fall off the bone. The foil creates a sealed steam environment that braises the meat, breaking down the remaining collagen and pushing through any temperature stall.
How to wrap correctly:
- Lay out a sheet of heavy-duty foil large enough to completely enclose the rack with room to fold.
- Place the rack meat-side down in the center of the foil.
- Distribute 2 tablespoons of sliced butter, 2 tablespoons of honey or brown sugar, and 2 tablespoons of apple juice around and under the meat.
- Bring the foil up around the rack and fold the edges tightly in multiple crimps to seal the packet with no gaps. Double-wrap if you have any doubt about the seal.
- Return the packet to the grate and continue at 225°F for 2 hours.
Why meat-side down in the wrap? The liquid pools on the meat side, braising the flesh directly as it steams inside the sealed packet.
Do not open the foil packet during the 2-hour wrap phase. The internal temperature inside a sealed foil packet reaches well above 225°F through steam pressure — opening it releases the accumulated heat and extends the cook time significantly.
At the end of 2 hours, the ribs will be very tender — sometimes so tender the bones slip loose when handled. Use heat-resistant gloves and support the full length of the rack when moving the packet off the grate.
Phase 3 — 1 hour to finish
Open the foil packet carefully — the trapped liquid is at or above boiling temperature. Tilt the packet away from your body to release steam before opening fully. Save the liquid in a heat-safe container; it makes an excellent finishing sauce base or basting liquid.
Return the ribs to the grate bone-side down. Cook uncovered at 225°F for 45 to 60 minutes. This phase firms the bark, which softened inside the moist foil environment during Phase 2.
Sauce window: Apply BBQ sauce 20 minutes before pulling the ribs. Brush on a thin coat, close the smoker for 10 minutes, then apply a second thin coat. Two thin coats caramelize into a glossy, sticky glaze; a single thick coat produces a gummy texture that slides off.
Going unsauced: If you prefer a dry bark, skip the sauce entirely and let the exterior re-firm for the full 60 minutes. A well-developed bark needs no sauce — it delivers sweet, smoky, savory crust in every bite.
A finishing sauce worth having on hand:
Best for Finishing spare ribs and pork shoulder
Blues Hog Original BBQ Sauce
Sweet and tangy with a thick consistency that caramelizes beautifully in the last 20 minutes of a smoke. A favorite at competition BBQ circuits for good reason.
★★★★★ 4.7 · 6,200 reviews
Check current price on Amazon→How to tell when the ribs are done
After Phase 3, use all three of these tests before pulling the rack:
Pullback test. Flip the rack and look at the bone tips at the thinner end. The meat should have visibly pulled back at least 1/4 inch from the tips. If the meat is still flush with the bone ends, the ribs need more time.
Probe test. Insert a toothpick or a thermometer probe between two bones in the center of the rack, not touching bone. It should slide in with almost zero resistance — similar to poking warm butter. Any stiffness means more time is needed.
Bend test. Pick the rack up by one end with tongs. A properly cooked spare rib rack droops significantly toward horizontal, and the bark surface cracks slightly when you bounce it gently. A rack that barely flexes is undercooked. A rack that collapses and the meat falls off is overcooked.
Internal temperature is an unreliable indicator for ribs — the small bones interfere with accurate probe placement. Use all three physical tests together. Let the finished rack rest on a cutting board for 10 minutes before slicing so the fibers firm slightly and the cuts between bones come out clean.
Choosing the right wood for 3-2-1 ribs
The ribs absorb smoke only during Phase 1. Whatever wood you choose, load it at the start of the cook — there is no benefit to adding more wood in Phases 2 or 3.
Apple is the top choice for spare ribs. Mild, slightly sweet smoke that complements pork without any risk of bitterness over a 3-hour exposure. Produces a classic mahogany bark color.
Cherry is similar to apple with a slightly darker, more complex sweetness. Blended 50/50 with apple, it produces a deep red color on the bark and a well-rounded smoke flavor.
Pecan is bolder than apple or cherry, with a nutty richness that pairs well with the brown sugar and honey in the foil wrap. A good option for those who want more depth without the intensity of hickory.
Hickory — use with caution. Three hours of dense hickory smoke can overpower pork ribs. If you want the classic hickory flavor, blend it with apple at a 1:3 ratio to prevent the taste from becoming too aggressive.
Mesquite — avoid. Mesquite produces intense, acrid smoke that turns bitter well before the 3-hour Phase 1 ends. Reserve it for hot-and-fast beef.
A reliable fruit wood chunk variety for ribs:
Best for Ribs, pork shoulder, chicken on offset or kettle smokers
Western Premium BBQ Wood Chunks Apple and Cherry
Kiln-dried apple and cherry chunks sized for long low-and-slow cooks. No soaking needed — dry chunks produce cleaner, thinner smoke than waterlogged ones.
★★★★★ 4.5 · 3,800 reviews
Check current price on Amazon→Common 3-2-1 mistakes and how to fix them
Wrapping too early. If the ribs look dark and dry at 2 hours and you wrap early, you cut short the smoke absorption and bark development. Dark bark in Phase 1 is correct — trust the process and wait for the full 3 hours.
A loose foil wrap. A poorly sealed packet loses the braising steam that makes Phase 2 work. Fold and crimp the edges in multiple overlapping folds. Double-wrap if you are not confident in the seal.
Skipping the liquid in the wrap. Dry-wrapping can still tenderize the ribs, but the added butter and honey provide richness and caramelization that make a significant flavor difference. Do not skip the liquid.
Saucing too early. BBQ sauce applied more than 30 minutes before pulling produces a blackened, bitter crust from burnt sugar. The last 20 minutes is the window — apply in two thin coats, not one thick one.
Not resting the rack. Cutting immediately after pulling releases juice onto the board rather than keeping it in the meat. Ten minutes on a cutting board makes a noticeable difference in moisture per bite.
Running the smoker above 275°F. Higher temperatures rush the cook but do not allow time for the fat and connective tissue to render properly. The result is tougher, drier meat even if the rack is technically done.
FAQ
Frequently asked questions
Does the 3-2-1 method work on a pellet grill?
Can you run 3-2-1 ribs at 250°F to save time?
Should you use foil or butcher paper for the wrap phase?
Do 3-2-1 ribs fall off the bone?
What liquid works best in the foil wrap?
Can you refrigerate and reheat 3-2-1 ribs?
Why do my ribs come out dry after the 3-2-1 method?
Bottom line
The 3-2-1 method is the most reliable path to consistently tender, deeply flavored spare ribs on any smoker. Smoke unwrapped at 225°F for 3 hours to build bark with apple or cherry wood, braise sealed in foil with butter and apple juice for 2 hours, then finish uncovered for 1 hour to re-firm the crust and caramelize the sauce. Use the pullback, probe, and bend tests together rather than relying on time alone. The structure handles most of the hard work — your job is maintaining a steady 225°F, wrapping tightly, and applying sauce at the very end.
For related reading: how to smoke pork ribs: baby backs and spare ribs, best smokers at every price point, how to use a smoker: complete beginner guide, or brisket smoking guide: low and slow step-by-step.