guides
How to Grill on a Charcoal Grill
Master charcoal grilling from first light to final bite — heat zones, vent control, timing, and doneness for burgers, chicken, steaks, and more.
 Cole Whitaker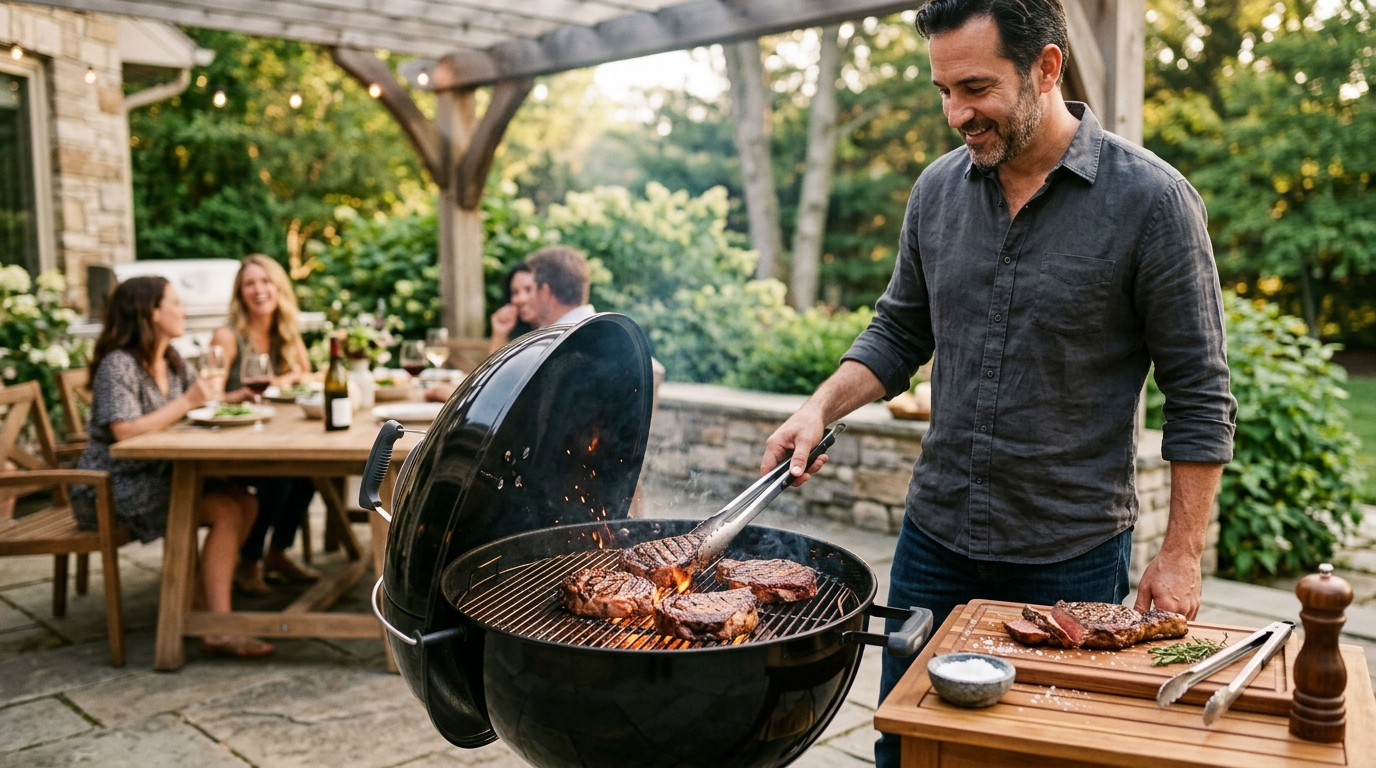
Grilling on a charcoal grill comes down to three fundamentals: get the coals lit and fully ash-covered before any food goes on, build a two-zone fire so you have both a hot searing side and a safe indirect side, and use an instant-read thermometer to confirm doneness rather than guessing by time. Master those three habits and everything else — burgers, chicken, steak, fish, vegetables — follows the same logic.
What do you need to grill on a charcoal grill?
A charcoal grill, charcoal, and an ignition method are the minimum. A chimney starter and an instant-read thermometer turn a frustrating first cook into a reliable one.
Non-negotiables:
- A charcoal grill — kettle, kamado, or barrel style; at least 22 inches for cooking versatility
- Charcoal — briquettes for long and steady burns, lump charcoal for faster lighting and higher peak heat
- A chimney starter — the fastest and cleanest way to light charcoal without lighter fluid
- Long-handled tongs and a spatula — grate-level heat runs 450 to 550°F
- An instant-read thermometer — removes all guesswork from doneness
Strongly recommended:
- Heat-resistant BBQ gloves for handling a hot chimney and adjusting lower vents mid-cook
- A wire grill brush or grill stone to clean the cooking grate before each session
- A clip-on grill thermometer positioned at grate level for accurate ambient temperature readings
Weber Rapid Fire Chimney Starter on Amazon: search here
Instant-read meat thermometer on Amazon: search here
How do you set up a charcoal grill before cooking?
Setup has three stages: lighting the coals, arranging them for the right heat configuration, and preheating the cooking grate. Rushing any stage costs you control over the entire cook.
Step 1: Light the charcoal with a chimney starter.
Fill the upper chamber of a chimney starter with charcoal — a full chimney (roughly 100 briquettes) for high-heat cooking on a standard 22-inch kettle, a half chimney for smaller loads or gentler sessions. Stuff the lower chamber with two sheets of loosely crumpled newspaper or a single fire-starting cube. Set the chimney on the charcoal grate, light from the bottom with a long-reach lighter in two or three spots, and wait 15 to 20 minutes. The coals are ready when at least 80% of the surface shows grey-white ash and you can see orange glow at the edges.
Do not rush this step. Coals that are still mostly black are not fully lit and will produce uneven, smoky heat that taints food flavor.
Step 2: Arrange the coals for your cooking style.
Once the coals are ready, pour them into one of three configurations depending on what you are cooking:
-
Full direct heat: Spread coals evenly across the entire charcoal grate. Every part of the cooking surface is a hot zone running 450 to 550°F. Best for thin, fast-cooking foods — hot dogs, thin burgers, shrimp, asparagus — that finish in under 8 minutes.
-
Two-zone setup (the right choice for most cooks): Pour all lit coals to cover one half of the charcoal grate, leaving the other half empty. The coal side runs 450 to 550°F; the empty side creates a cooler indirect zone around 300 to 350°F with the lid on. Sear over the hot side, then slide food to the cool side to finish without charring. This setup handles burgers, bone-in chicken, steaks, sausages, and virtually everything in between.
-
Snake method for low and slow: Arrange unlit briquettes in a single-layer curved line around the grate perimeter. Light 10 to 12 coals in the chimney and pour them at one end of the snake. The fire travels slowly along the line over 4 to 6 hours, maintaining 225 to 275°F without adding more fuel. Use this for ribs, pork shoulder, or brisket.
Step 3: Preheat and prepare the cooking grate.
After pouring the coals, slide the cooking grate into place, close the lid with both vents fully open, and wait 5 minutes. The grate needs to be hot before food touches it — a cold grate causes sticking and prevents proper sear marks. After preheating, scrub the grate vigorously with a wire brush to remove any residue from previous cooks. Then fold several paper towels, dip them in high-smoke-point oil (canola or vegetable oil — not olive oil, which burns at searing temperatures), and use long tongs to wipe the grates twice. Properly oiled grates release food cleanly and produce better browning.
How do you control temperature on a charcoal grill?
Temperature on a charcoal grill is governed by two levers: the amount of charcoal and the vent positions. The vents are the throttle.
Bottom vent (the intake vent): Controls how much oxygen reaches the burning coals. Fully open means maximum airflow and maximum heat. Closing it 25 to 50% restricts airflow and drops grate temperature by 50 to 100°F. Never fully close the bottom vent while food is actively cooking — smothered coals produce thick, acrid smoke that ruins flavor.
Top vent (the exhaust vent): Controls how quickly hot air exits the grill. Keep it fully open for most cooking. Partially closing it slows the draft through the system, which drops temperature as a secondary control. The bottom vent is where most adjustments happen — the top vent is a fine-tuning tool.
Why the built-in lid thermometer misleads you: Most charcoal grills have a thermometer mounted in the lid dome, which sits 6 to 8 inches above the cooking grate. Dome temperature runs 50 to 100°F higher than actual grate-level temperature because heat rises. A clip-on grill thermometer clipped to the cooking grate gives the accurate reading you need.
Target temperature ranges by cooking style:
| Cooking style | Grate temp | Bottom vent position |
|---|---|---|
| High-heat searing | 450 to 550°F | Fully open |
| Medium-heat grilling | 350 to 450°F | 50 to 75% open |
| Indirect finishing | 300 to 350°F | 25 to 50% open |
| Low and slow barbecue | 225 to 275°F | 10 to 25% open |
How long do you grill common foods on a charcoal grill?
These are starting-point estimates. Always verify with a thermometer — thickness, coal temperature, and ambient conditions all shift actual timing.
Burgers
Form 80/20 ground beef into patties 3/4 to 1 inch thick. Grill over direct high heat for 3 to 4 minutes per side without pressing the patty — pressing forces juice into the fire and dries out the burger. Internal temperature target: 160°F for fully cooked, or 150 to 155°F if you prefer a juicy medium-well. Add cheese in the final 60 seconds and close the lid to melt it quickly.
Bone-in chicken
Bone-in thighs and drumsticks need the two-zone method to cook through without burning. Sear skin-side down over direct heat for 3 to 4 minutes to render and crisp the skin, then flip and move to the indirect zone. Close the lid and cook until the internal temperature reaches 175°F — usually 25 to 35 more minutes. Bone-in breasts are done at 165°F and cook faster than dark meat. Avoid the temptation to keep checking: every lid lift drops the temperature 25 to 50°F and extends the cook.
Steaks
For steaks 1 to 1.25 inches thick, sear 2 to 3 minutes per side over direct heat, then check the temperature. A 1-inch ribeye often hits the target temperature (125 to 130°F for medium-rare) after searing alone. For cuts 1.5 inches or thicker, sear both sides and slide to the indirect zone until the internal temperature is 5°F below target — pull at 125°F for medium-rare, 135°F for medium. Rest for 5 minutes before cutting.
Sausages
Hot dogs and pre-cooked sausages need 2 to 3 minutes over direct heat with regular rotation. Fresh sausages — bratwurst, Italian sausage — do better with the two-zone method: start over indirect heat for 15 to 20 minutes until the internal temperature reaches 155°F, then sear briefly over direct heat to snap the casing and add color.
Fish and seafood
Fish fillets and shrimp cook fast and stick badly to dry grates. Oil both the fish and the grates generously. Salmon fillets (1 inch thick) take 4 to 5 minutes per side over direct medium heat. Shrimp skewers take 2 minutes per side. Fish is done at 145°F internal temperature and should flake cleanly with a fork at the thickest point.
Vegetables
Cut dense vegetables into flat slabs for maximum grate contact. Zucchini, bell peppers, and asparagus spears take 4 to 6 minutes over direct medium heat. Corn on the cob in the husk goes over indirect heat for 20 to 25 minutes, turning every 7 minutes. Portobello mushrooms caps take 5 to 6 minutes per side over direct heat.
How do you prevent and handle flare-ups on a charcoal grill?
Flare-ups happen when fat drips onto hot coals and ignites. Brief flares of a second or two add smokiness and are part of charcoal grilling. Sustained flares that last 10 seconds or more char the exterior before the interior cooks.
The only reliable prevention: the two-zone fire. When a flare-up starts under food, slide the food immediately to the empty indirect side. No coals underneath means no fuel for the flame. The flare dies within seconds. This is the single strongest argument for always setting up a two-zone fire instead of full direct heat.
Do not reach for water. Pouring water on a charcoal fire creates a steam burst that spreads ash and coal dust across the food and dramatically drops grate temperature. Let the two-zone setup handle it.
Trim excess fat before grilling. Heavily marbled cuts, skin-on chicken, and fatty sausages produce the most drip. Trimming the outer fat cap to 1/4 inch and patting the skin dry before grilling reduces drip without sacrificing flavor.
Close the lid during sustained flares. If food cannot move to the indirect zone — in a small grill or a packed grate — closing the lid for 30 to 60 seconds cuts off oxygen and starves the flame. Open it again before the coals begin to smolder.
FAQ
Frequently asked questions
How do you grill on a charcoal grill for beginners?
How long does a charcoal grill stay hot enough to cook?
How do you know when the charcoal grill is hot enough to cook?
Should the charcoal grill lid be open or closed while cooking?
Why does my food taste bitter or like smoke on a charcoal grill?
How do you add more charcoal in the middle of a cook?
Bottom line
Charcoal grilling rewards a consistent system: light a full chimney and wait for grey ash, build a two-zone fire by banking the coals to one side, preheat and oil the grate, and verify every protein with a thermometer. The two-zone setup is the most impactful habit you can build — it gives you both a searing zone and a safe finishing zone, which eliminates most of the burnt exteriors and undercooked centers that frustrate beginners. Start with burgers and bone-in chicken thighs to develop your instincts for reading the fire, then scale to steaks, whole birds, and low-and-slow cuts as your confidence grows.
For related reading: how to light a charcoal grill step-by-step, the best charcoal grills at every price point, how to grill a perfect steak on charcoal, and charcoal vs. lump charcoal — which burns better?.